
To complete the PCC application through BLS there are 2 main steps to follow. The first step is to submit an online PCC application through the Indian Passport Seva Government website. It is covered in this post. The second step is to send all your documents to BLS by mail. It is covered in this post How to apply PCC through BLS
This article will cover the first step to fill the PCC form and submit online. First of all, open Passport Seva website here. You will see the option to Register and User Login.
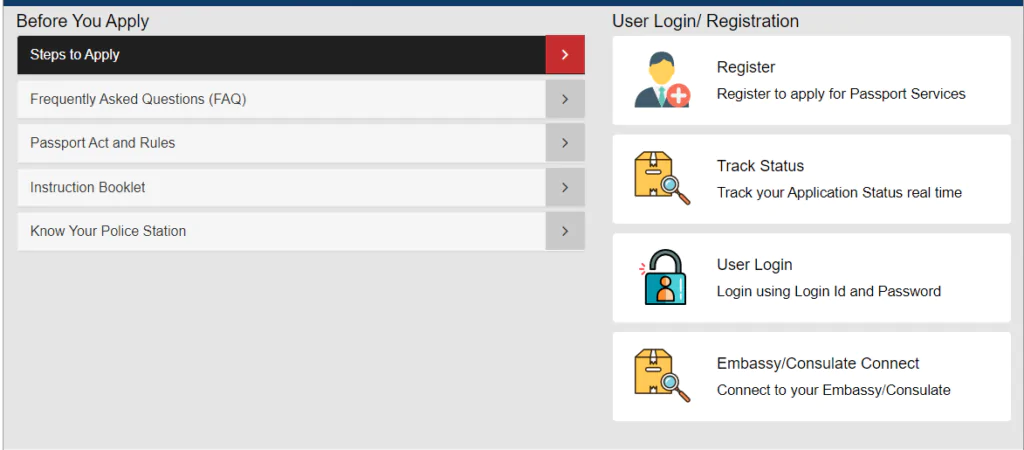
Register Account for Passport Seva
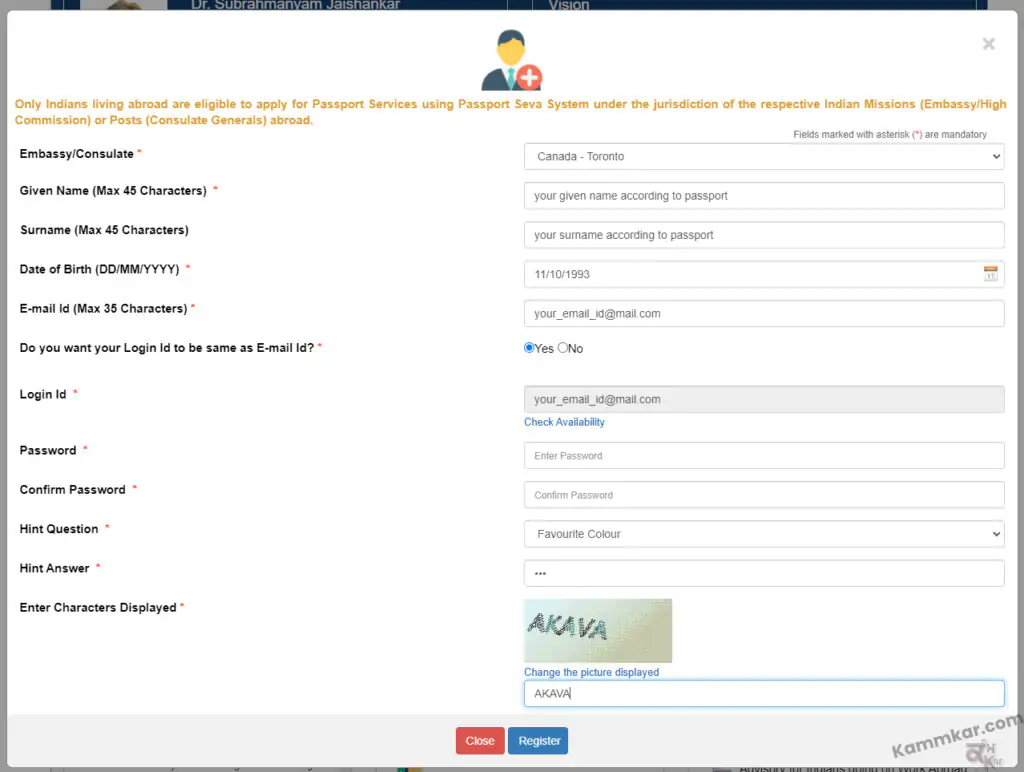
If you don’t already have an account on the Passport India website you need to create one. To do that click on Register and fill the form as shown.
Once registration is complete, click on the User Login button, enter your login Id, Password and click on Login and you will see a page like this. Click on Apply for Police Clearance Certificate

The PCC form will open. Start filling the form as per instructions
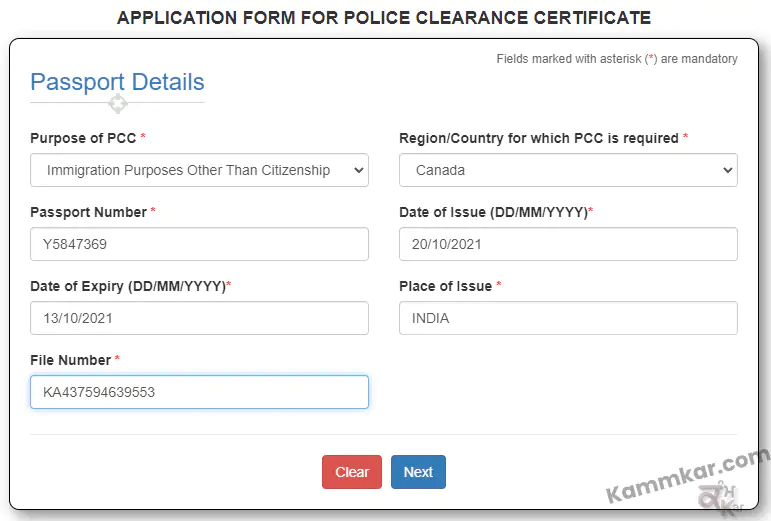
1. Passport Details for PCC
Enter the passport details according to your passport.
- Purpose of PCC – Immigration Purposes Other than Citizenship
- Region/Country for which PCC is required – Canada (Country where the PCC is required)
- Passport Number – Enter your passport number
- Date of Issue- Enter passport issue date
- Date of Expiry – Enter the passport expiry date
- Place of Issue – Enter passport issue place
- File Number – you can find your file number on the last page of your passport.
- Make sure all the details are correct and click the Next button
2. Applicant Details
- Given Name – according to passport
- Last Name (surname) – according to passport
- Gender – Select your gender
- Place of Birth – according to passport
- Marital Status – Single / Married / Divorced / Separated etc.
- Citizenship of India by – Birth (or other option)
- PAN – enter PAN number if you have one.
- Voter Id – enter voter id if you have one.
- Employment Type – The employment type is for India, not Canada. Select others if no option is applicable.
- Educational qualification – Select your qualification
- Aadhaar Number – enter Aadhaar card number if you have one.
- Tick Mark on Yes, after reading the statement

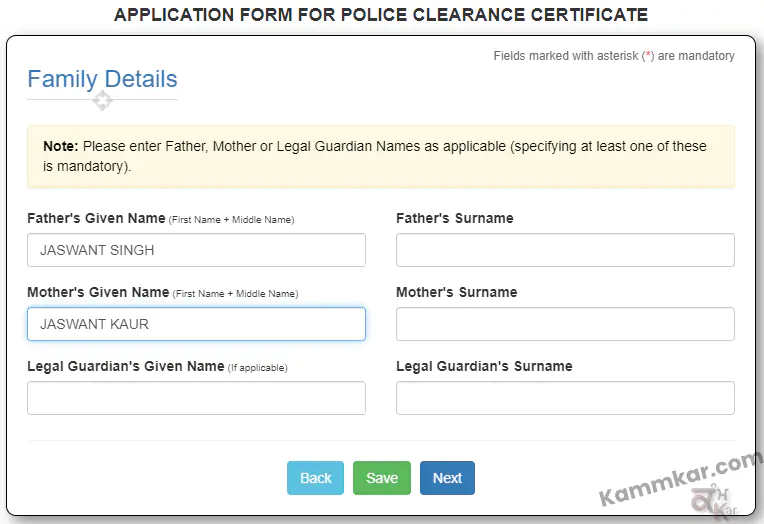
3. Family Details
- Father’s Given Name – Enter the first and middle name of your father
- Father’s Surname – Enter your Father’s Last Name
- Mother’s Given Name – Enter the first and middle name of your mother
- Mother’s Surname – Enter your Mother’s Last Name
- Legal Guardian’s Given Name and Surname- If someone other than your parents is taking care of you, then fill in this field
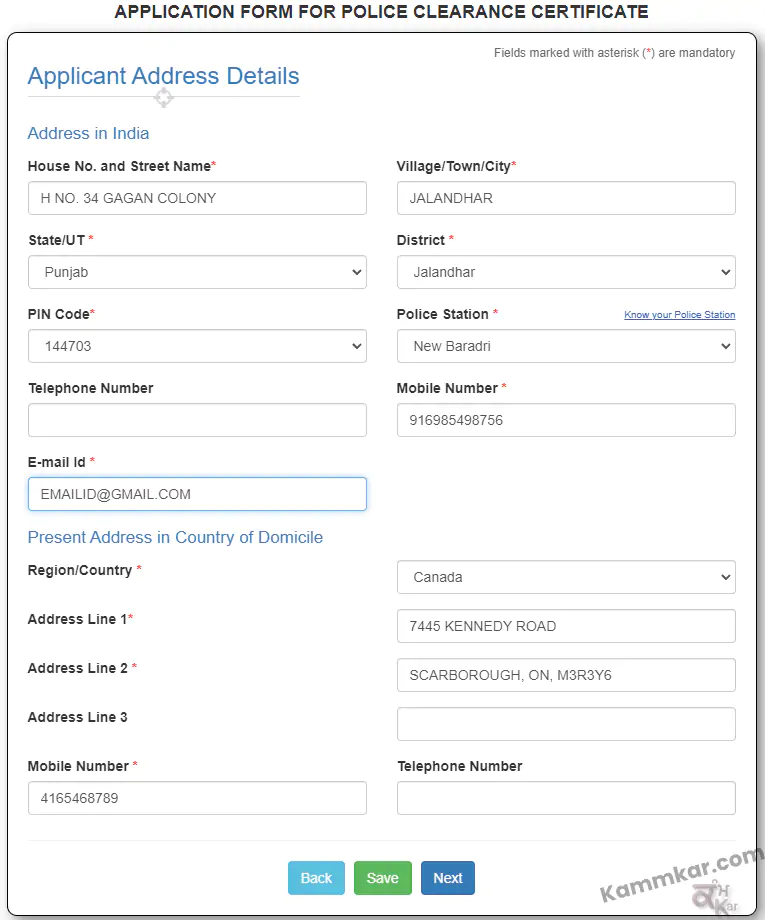
4. Present Residential Address
You need to fill in your current Indian address in this form. Also, it should match your passport.
If your current address has been changed and does not match with your passport. You need to provide an additional Indian Address Proof document.
- House No. and Street Name – You can enter your house number or if the house number is not available then provide a street name or nearest landmark name, etc
- Village/Town/City – Provide your city or village name.
- State/UT – Select State
- District – Select District
- PIN Code – PIN codes will appear according to the District you selected.
- Police Station – Select the police station after selecting the PIN code.
- Telephone Number and Mobile Number – The mobile number is required (Indian Mobile number), Telephone No. is optional
- E-mail Id – Provide your email id. You will get all updates on this id.
Present Address in Country of Domicile
In this section, you need to enter your own current address details (not Indian address details)
- Region/Country – Select Canada (or different country if accordingly)
- Address Line 1 – Enter House Number and Street Name
- Address Line 2 – Provide City, State, and Zip or Postal Code
- Address Line 3 -This one is optional and you can provide additional info if you want to.
- Mobile Number – Give applicant’s mobile number (not Indian mobile number)
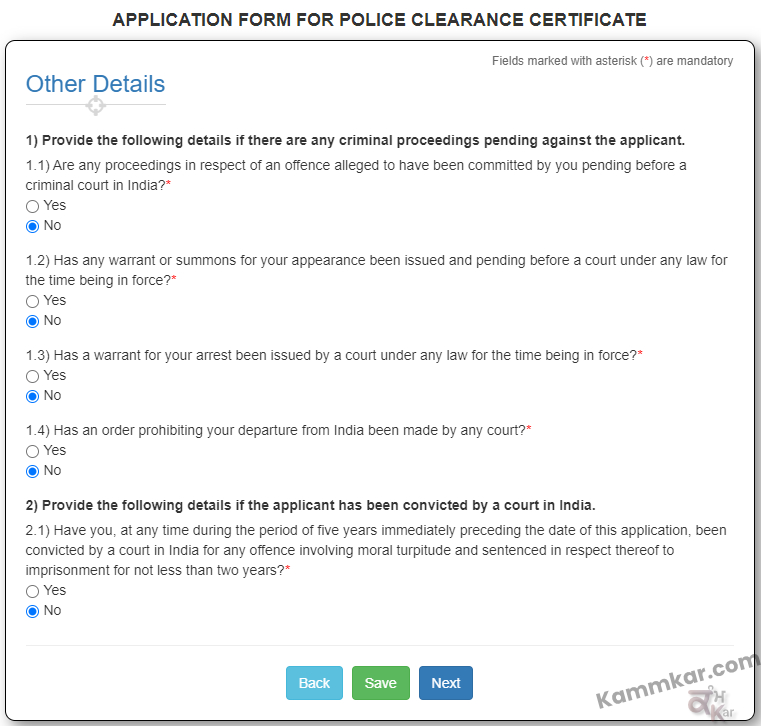
5. Other Details
This section asks questions regarding your criminal record in India. If you do not have any criminal background, then all these options will be NO.
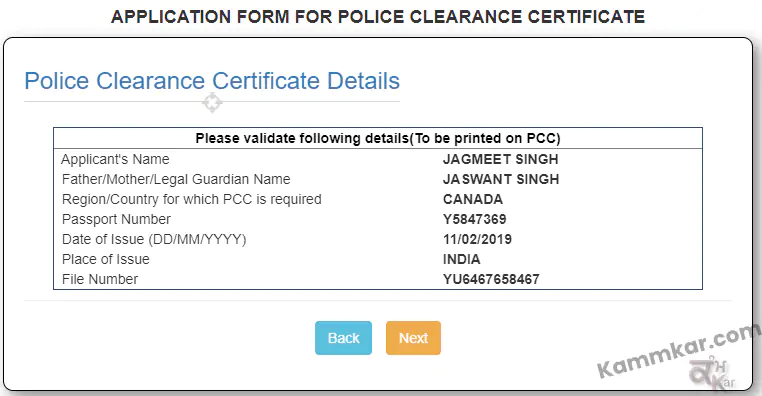
6. PCC Details
This page shows the essential details which will be printed on your PCC. Double-check all the details because you can not change these once the application is submitted.
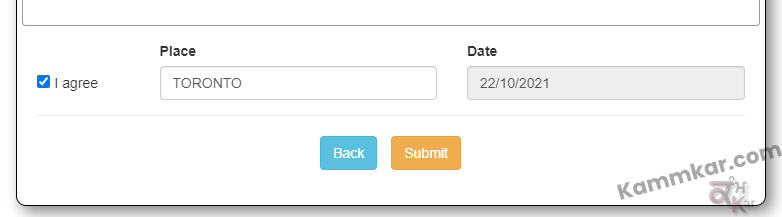
7. PCC Details Verification
This section will show all the details you have filled in. Check all the details, if something is wrong, you can go back by pressing the BACK button at the bottom of the application form.
After Carefully reading everything, Fill in the Place (the current city name), tick mark agree and the Submit
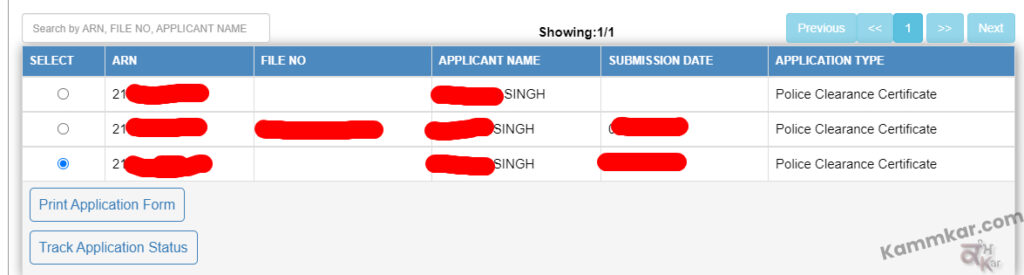
Once the application is submitted online You will get back to the main page and your submitted application will show up. Click on Print Application Form
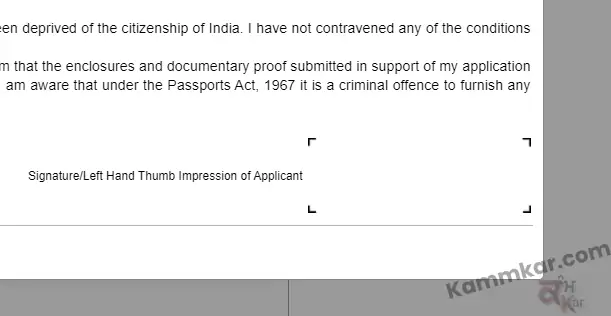
Now to take a printout, do not press Ctrl+P. Instead, Press the Print button on top of the form.
After taking the printout, attach a 51mm x 51mm photo in a given square area and write your signature with a black pen below the photo.
Also, sign on the last page of the application form.

Now your PCC application form is submitted online and you also have a printout that you will send to BLS.
To follow the second step of applying through BLS, check this post How to Apply PCC through BLS


Pingback: BLS PCC-Pick up and drop off service - Kammkar
Pingback: How to find ARN number BLS – PCC application form - Kammkar
hii there… the link for bls pickup is not working for me… i have tried it so many times not even from your blog but also from other ways but still it’s a blank white page for me. Please help!
Hi Suman, I suppose the website was down that day. It’s working fine now.